jueves, 8 de septiembre de 2011

Almohadón para mascotas con retazos de tela


dogbed_thumb.jpg
Nuestras queridas mascotas también merecen un regalo de Navidad, por eso les traigo hoy una idea para que puedan hacerles un obsequio artesanal.
Se trata de un almohadón muy confortable para perros o gatos y que cada cual confeccionará a la medida del animalito, para que esté cómodo y calentito en las noches de invierno. Seguro que a tu mascota le encantará el regalo. Si te animas a hacerlo, lee a continuación el paso a paso para saber cómo hacer unalmohadón con retazos para perros o gatos.
Materiales:
Telas
Retazos de telas
Máquina de coser
Hilo
Alfileres
Cierre
Paso a paso:
Corta los retazos de tela en triángulos y cóselos de a 4 formando el siguiente diseño.
224.jpg
Cose entre sí los cuadrados resultantes y forma una tela cuadrada de un tamaño apropiado para la mascota. Para ensamblar los cuadrados de tela guíate por el siguiente dibujo.
124.jpg
Corta 3 telas de la misma medida que el cuadrado de retazos, coloca todas las telas juntas, sujétalas con alfileres y recorta un círculo. Corta a la mitad una tela círcular y adhiérele un cierre para poder abrir el almohadón y lavarlo. Corta las dos telas restantes 4 cm más pequeñas, cóselas juntas dejando un pequeño agujero para rellenar, rellena y cierra la costura.
Pon la tela de retazos y la tela con el cierre derecho con derecho y cose todo alrededor.
Da vuelta, coloca el almohadón dentro y cierra el cierre.
Ya está listo el almohadón para mascotas. Ahora arma un lindo envoltorio y colócalo bajo el arbolito. Y también para todas las mascotas, les decimos ¡Feliz Navidad!


http://www.lasmanualidades.com/2010/12/26/almohadon-para-mascotas-con-retazos-de-tela

Cómo hacer un perro con un calcetín


Cómo hacer un perro con un calcetín cab.jpg
Un perrito es uno de los animales que estaban faltando en la colección de animalitos hechos con calcetines de Las Manualidades. Y este perro calcetín se hace muy fácil y además se puede coser a mano, por lo tanto cualquiera lo puede hacer. Porque ¿quién no tiene un calcetín viejo, una aguja e hilo? No te pierdas este paso a paso para hacer un simpático perro con un calcetín.

Materiales:

  • Un calcetín
  • Relleno
  • Aguja
  • Hilo
  • Alfileres
  • Un trozo de cinta
  • Un botón

Paso a paso:

Para hacer este perrito de un calcetín de Create Studio, debes formar de forma separada las siguientes partes: el cuerpo, la cola, las piernas y las orejas. Para hacer cada una de las partes, corta primero el calcetín guiándote por la siguiente imagen:
Cómo hacer un perro con un calcetín 1.jpg
Cuerpo: Utiliza la pieza más grande para hacer el cuerpo del perrito calcetín. El talón será la parte superior de la cabeza, así que debes dar vuelta el calcetín, coser la parte delantera en un arco y reservarlo para agregarle la cola, las piernas y las orejas.
Cómo hacer un perro con un calcetín  2.jpg
Orejas: Con la punta del calcetín forma las orejas. La punta se corta en dos mitades y se cosen por separado, sin rellenar.
Cómo hacer un perro con un calcetín  3.jpg
Cola: Forma la cola con el sector alargado que has cortado del calcetín. Para ello da vuelta la pieza, cósela, vuélvela a dar vuelta y rellénala. Para hacer este paso de forma fácil, pon un poco de relleno dentro de la pieza, empújalo con un lápiz u otro instrumento en punta, vuelve a poner relleno y a empujar, y continúa hasta conseguir que la cola quede rellena y firme.
Cómo hacer un perro con un calcetín  4.jpg
Patas: Cada uno de los rectángulos de las patas lo debes coser por separado. Para ello da vuelta la tela, cose los 3 laterales (dejando un lado para rellenar), da vuelta la tela y rellena cada una de las patas.
Cómo hacer un perro con un calcetín  5.jpg

Armado del perro calcetín:

Luego que tienes cada una de las partes terminadas, rellenas y sujetas con alfileres, ya puedes armar el perro calcetín. Para ello rellena el cuerpo y luego agrega una a una las partes. Para coser las piernas y la cola puedes hacer un pequeño corte en el cuerpo en el sitio donde irá cada pieza, colocar los bordes de la tela hacia adentro y luego coserlo con prolijidad.
Por último, cose un botón a modo de hocico, átale una cinta al cuello y también puedes bordarle los ojos o colocarle ojitos movibles de plástico.
¿Verdad que queda lindo? Y es otro animalito hecho con un calcetín para hacerle compañía a los otros animalitos hechos con calcetines que hemos visto en Las Manualidades.
IMG_0964.JPG

http://www.lasmanualidades.com/2011/09/06/como-hacer-un-perro-con-un-calcetin

Fleece Dog Toy Tutorial


Can you keep a secret?

Abby was quite suspicious this afternoon when she saw me taking one of her toys. 

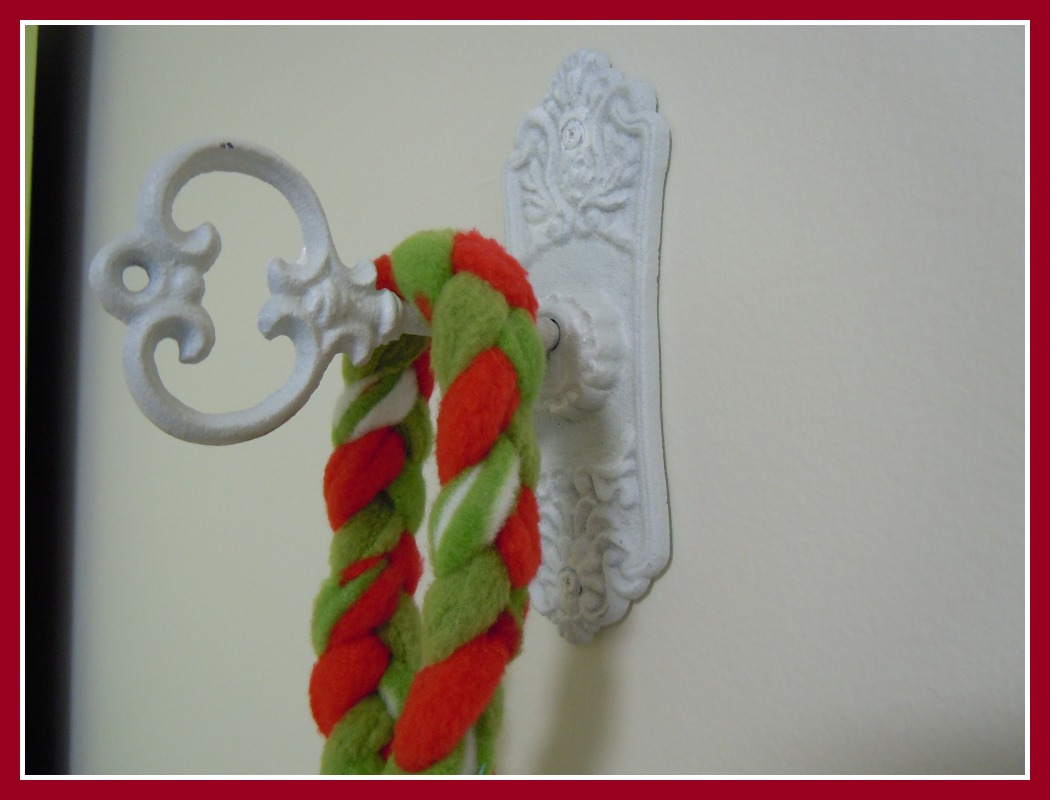
The orange/green/yellow toy is the old stinky one.  It needs to be washed.  The one on the right is her new Christmas toy.  I studied the old one and decided "I can do this."  Abby has enjoyed her old toy for quite some time and I can tell you it is very durable.  I like this toy because it keeps my hand far away from her mouth when she's pulling and adjusting her "grip."  And the loop allows me to hold on for dear life when she starts shaking her head like a wild beast.  Abby also really enjoys chewing on the knots too.  She's a chewer.

All you need is 3 strips of fleece measuring 2 1/2" wide by width of fabric which is about 60".  The fleece I used is anti-pill.  Not sure it really makes a difference.

Find the center of the strips.  Mr. Creations didn't seem to mind that I interrupted his tv time.  Plus he has very photogenic hands. 

Another set of hands makes this so much easier.  Braid evenly in the center of the strips for about 12".  You'll want to braid as tight as you can through the entire process.

Fold in half then have your helper hold all of the fleece strips as shown in the photo.

Matching up your green to green, red to red, and dot to dot you'll now braid with your two strands of each color set as "one", about 6" in length.

Knot and have your strong handy helper pull very tight.  Pulling each strip helps with the tightening.

After the knot you'll now braid in two sets--a set of each color group (one red, one green, one dot), about 6" in length.

The last step is to knot each end and pull tight.  I hope this makes sense.  I'm a visual learner so I wanted to share plenty of step by step photos.

You certainly wouldn't want to forget your 4-legged friends this holiday season!  This toy will provide endless hours of cheap thrills.

~Piecefully, Stephanie

Cat Powered Auto Feeder

Cat Powered Auto Feeder

i
I needed a self feeder for my cat, so he would stop waking me up. After looking around on the Net (and instructables) I did find one that I based this feeder on, in a book called (Snowball Launchers, Giant-Pumpkin Growers, and Other Cool Contraptions by Tom Fox) I take no credit for it. Just didn’t like the idea of using cardboard. I also wasted a lot of time trying to use electric motors and timers. This was a much better idea and has been working well so far.


Step 1Tools and Parts

Tools and Parts
i
Tools Needed:  Something to make holes (knife, scissors, drill)

Parts: Clamp type paper clip, rubber bands, golf ball, wire (bread) tie, round food container, 2 liters pop bottle (not shown) and at least one screw for mounting. ((PVC pipe see update on Step 5))

Step 2

i
Cut a small hole in the lid of the food container, big enough for the rubber band to go through. In the bottom of the container cut a hole just big enough to thread the pop bottle into.

Step 3

i
  • 3.jpg
  • 4.jpg
Take the bottle and cut it down to make a funnel that will fit tight inside the food container.

Cut the hole in the clear cup just big enough so the bottle can be threaded through it, (were the cap was) This will keep it in place.


Step 4

i
  • 5.jpg
  • 6.jpg
Run the wire through the ball, this will keep the cat from chewing on the rubber band. Add rubber bands until it will reach the top of the container.

Step 5

i
  • 7.jpg
  • 7a.jpg
  • 13b.jpg
  • 13.jpg
That’s it, now just thread the bottle into the inside of the container, run the rubber band with the ball into the bottle and pull it up to the hole in the lid clipping it with the paper clip.   Update.... the top turned out to be to thin, so the clip was replaced with a PVC pipe.

Step 6

i
  • 8.jpg
  • 9a.jpg
  • 9b.jpg
  • 11.jpg
  • 12.jpg
Use the screws to mount it to something solid, and high enough to remove the lid. The edge of his play tower worked out well. If you need to I’m sure you could mount it to the wall with a block of wood.

Training was pretty easy. Show your cat that food will fall each time the ball is pushed or pulled down. With Apollo, it took one time. One problem I did find is he will pull the clip off the top dropping the ball, but only when he runs out of food.